
The only pair of shorts I’ve made up till now were cheater shorts… they were a refashion from a pair of pants and they didn’t end up fitting all that well. :/ This past weekend, I finally got around to trying shorts again – times two!
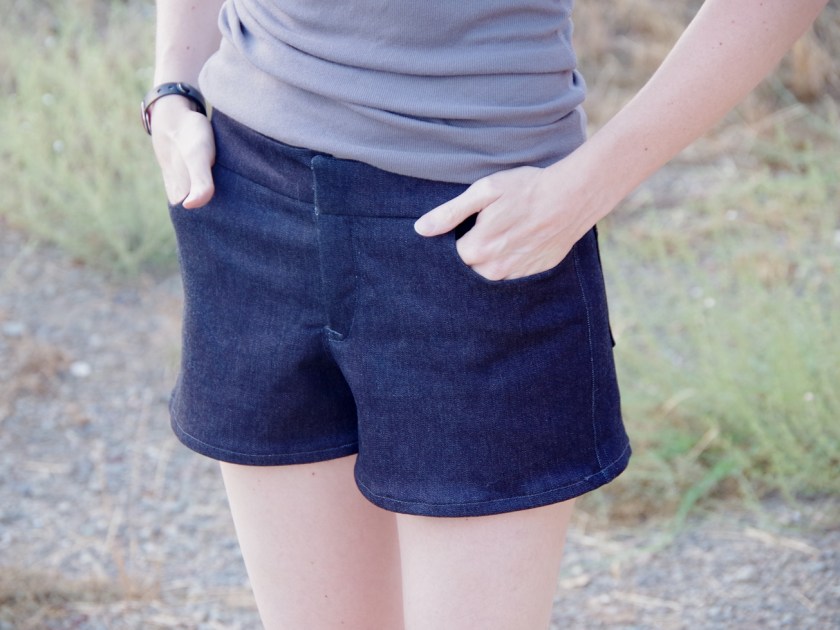
First up – Maritime shorts for me! I’m been wanting to try this pattern for a while. It’s such a simple style that fits perfectly into my wardrobe.

I went all gung ho believing the fit was going to be great with no alterations and cut out two pairs at once. Probably not the best idea… but apparently I enjoy learning the hard way. I cut one out of a stretch twill and I had just enough to eeek out a second pair from my leftover Ginger Jeans denim. Well, almost enough; I filled in with some shower curtain fabric (also used here, here, and here) for the back of the waistband and one of the pockets.

SO the fit… I cut a straight 6. But, just like when I made my ginger jeans, the back was gaping way too much so I took in the back center seam toward the waist (I had already nicely finished the side seams with flat felled seams so I didn’t want to touch them). After a little searching, it seems maybe I need to do a swayback adjustment in the future… I’ve never thought of myself as having very much junk in my trunk, as you might say, but maybe there’s more than I thought. lol… I’m learning so much about myself.

That, or maybe I just need to try grading in at the waist to a smaller size. Really not sure what will work best.
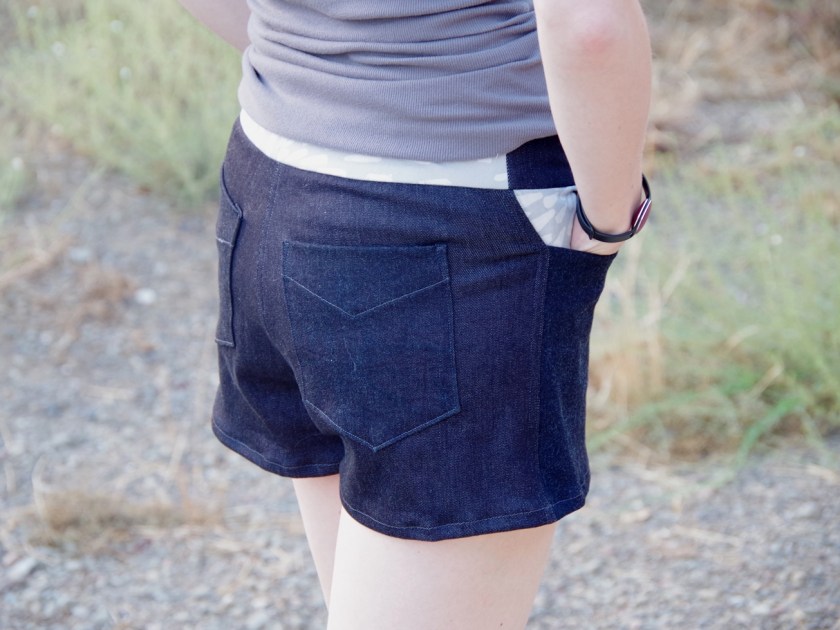
In that last photo, I’m cheating with my hands in my pockets. Without it, I would have a wedgie. :( I read up a little on how to do a ‘wedgie adjustment’ aaahhaha but I’m hoping if I work out the other fitting issues, that will just go along with it? Most say you get the wedgie because they are too tight, but I actually have a lot of extra fabric hanging out with these, so maybe it’s the curve of the seat. Hmm…

I don’t know how many times I need to learn the hard way to stabilize my seams when working with stretchy fabrics, but here ya go… one more! lol I wish the bottom seam was a little less wavy but maybe after a wash and another hard pressing, it’ll get better.

I did flat felled seams on all of the inner seams that I could (even the pocket seam that you will never see!). It was really good practice, if nothing else. I folded the inner seam the wrong direction, though, so it looks a little funny where it meets up with the fly. BUT… moral of the story… I made shorts! lol My twill fabric is cut but luckily I finished these first before getting too much into assembling the second pair. I’m going to mull over the fit for a while before I adjust & sew them up.

Next up – Jalie Board Shorts for the boyfriend! This was my first time using a pattern from Jalie, and I have to say I’m very impressed. I loved the pattern file, for one. I appreciate any PDF pattern that’s easy on my printer. I always like to have the directions with me, but more often than not there are way too many pages so I run back and forth between my printer and sewing machine in the other room. This one had only 3 that I needed to print! One with the instructions and two with great little diagrams. Thank you, Jalie!
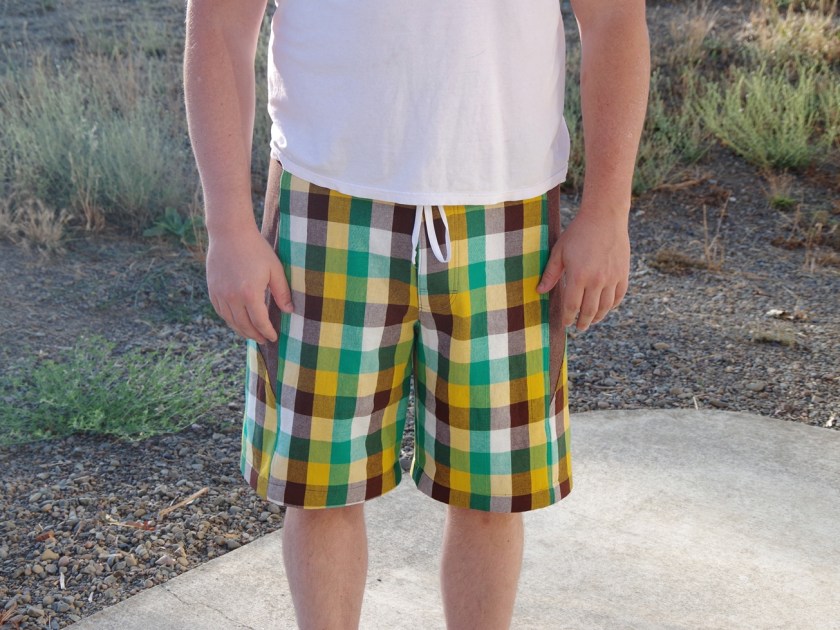
I couldn’t find a board short fabric that I liked, so I tried this Robert Kaufman Double Cloth – it’s two layers (one side is plain brown, the other is the plaid). They aren’t technically board shorts without the right fabric, but I was going for comfy casual shorts instead. And they fit perfectly into the TMS challenge this month – ‘Check’ it out!
![]()

Unfortunately, as you may have noticed, there is absolutely zero pattern matching going on here! I cut out the fabric with plans to make them mostly brown with an accent of the plaid. Then last minute I changed my mind and wanted to go a little more bold, so I turned the pieces around. I’m just glad the front looks mostly well coordinated.

Before starting, I considered adding length to the pattern but I’m glad I didn’t – these were so long! I shortened the hem an extra ~1.5″. The legs also came out a little wider than I would have liked but overall I loved the pattern. And with all of the topstitching, these are really sturdy shorts!
 There are the guts! All of the seams are serged then tacked down with the topstitiching. All of the construction was really straightforward.
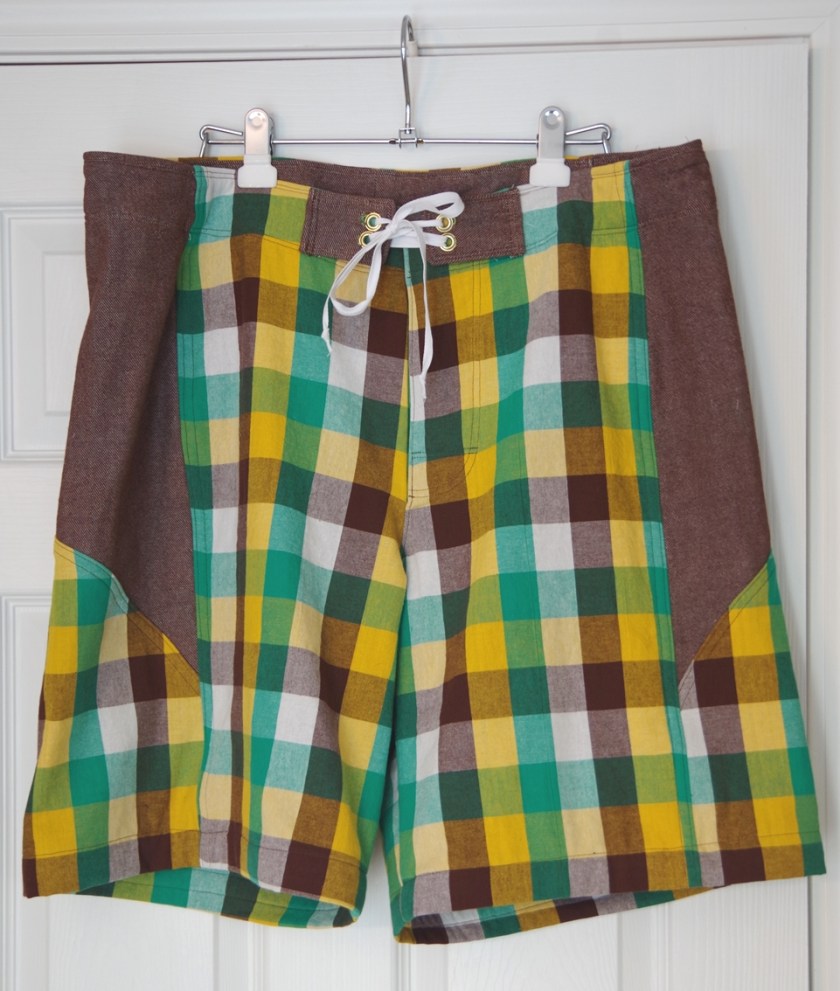
Which brings me to… the one major problem I had! The eyelets! This was my first time doing eyelets and it was a major fail! Look at those!! :( Sad day.

He barely put them on for the photos and they did this! Were my holes just too big? Did I not secure them well enough to the fabric? Was it just the fabric itself? I’ll have to take the tabs off and try again, but for now this is how they’ll stay :/
This post wouldn’t be complete without a photo of the entire look. Notice the socks with sandals… this is how he would go out every day if I didn’t stop him :/ Embarrassment is not a word in this guy’s vocabulary. :)

Until next time,


Pingback: A Frozen Halloween! | Life by Ky
Pingback: Top 5 of 2015 | Life by Ky
Pingback: An unannounced look into my sewing room… | Life by Ky
Pingback: PJ Masks Costumes | Life by Ky