

Seven Dwarf Costumes – Part Three
Tunics and Hats! (see also: belts and shoes)
Also, a fun word that I learned in the process of making these: armscye aka the armhole, refers to the opening to which the sleeve is sewn. Who knew!? (well, probably a lot of people… but not me!)
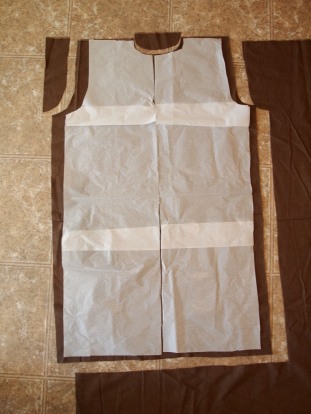
So here’s my makeshift pattern (not to scale) and process. Each tunic used approximately 3 yards of fabric; some a little more some a little less depending on the size. For Dopey’s tunic, it ended up taking a full 5 yards of fabric. I used solid flannel for 5 of the tunics and broadcloth for the other 2.

STEP ONE: GET MEASUREMENTS
Here are the measurements I took from each individual for the tunics:
- Length from neck to knee (or however long they wanted the tunic)
- Shoulder width
- Arm length (shoulder to wrist)
- Abdominal circumference (I used this both for the belt and the tunic)
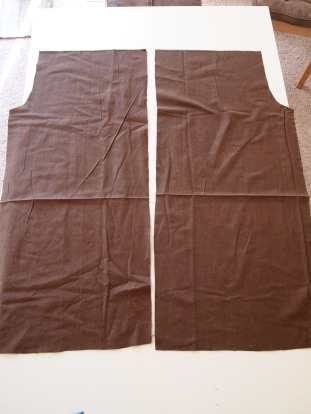
STEP TWO: MAKE PATTERN AND CUT FABRIC
Note: I only ended up needed to make one pattern to go along with the smallest measurements… from there, I cut the paper in half and used the same pattern but adjusted to meet the size of each person’s tunic. I cut the back piece first, then used it as a pattern for the front, adding a few inches to each front piece (I’m sure there would’ve been an easier way to do this if I had cut on a fold… but this is what I did) :)


STEP THREE: PUT PIECES TOGETHER AND SEW BOTH SHOULDER SEAMS


STEP FOUR: CUT AND ATTACH SLEEVES
I measured and cut the sleeves right from each tunic, then used this tutorial to assist with attaching them to each armscye.


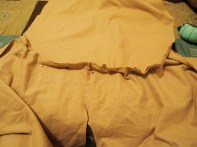

STEP FIVE: SEW AND HEM
I first sewed one long seam along the arm and down the side of the tunic, then turned it right-side out and hemmed each raw edge (fold, press, fold, press, sew) to make it look more finished.
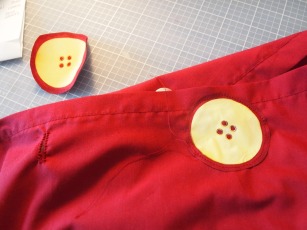
STEP SIX: HIDDEN BUTTONS!
Lastly, I wanted big, fun buttons but didn’t want to buy big, fun buttons. So I printed big buttons onto iron-on transfer paper, transferred each to the same fabric as the tunic and cut around each button. From there, I made hidden buttons by sewing the buttonhole — then sewing the fake button over the buttonhole — then sewing regular, smaller buttons on the other side of the tunic. Because of the fun nature of these costumes, I think it worked out perfectly.


The hats were pretty simple. I used old t-shirts for most of them. I basically just cut two pieces of fabric in this approximate shape, sewed the edges and hemmed the bottom:

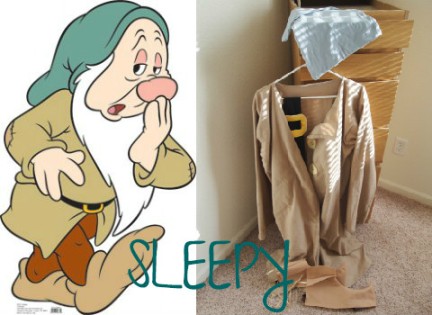
For Dopey’s neckline, I made a detached piece in case it got too hot (since his whole costume was very over-sized). It was basically just a small infinity scarf – actually, that was my inspiration to make my own infinity scarf – I tried on Dopey’s neckline and almost kept it for myself! :)
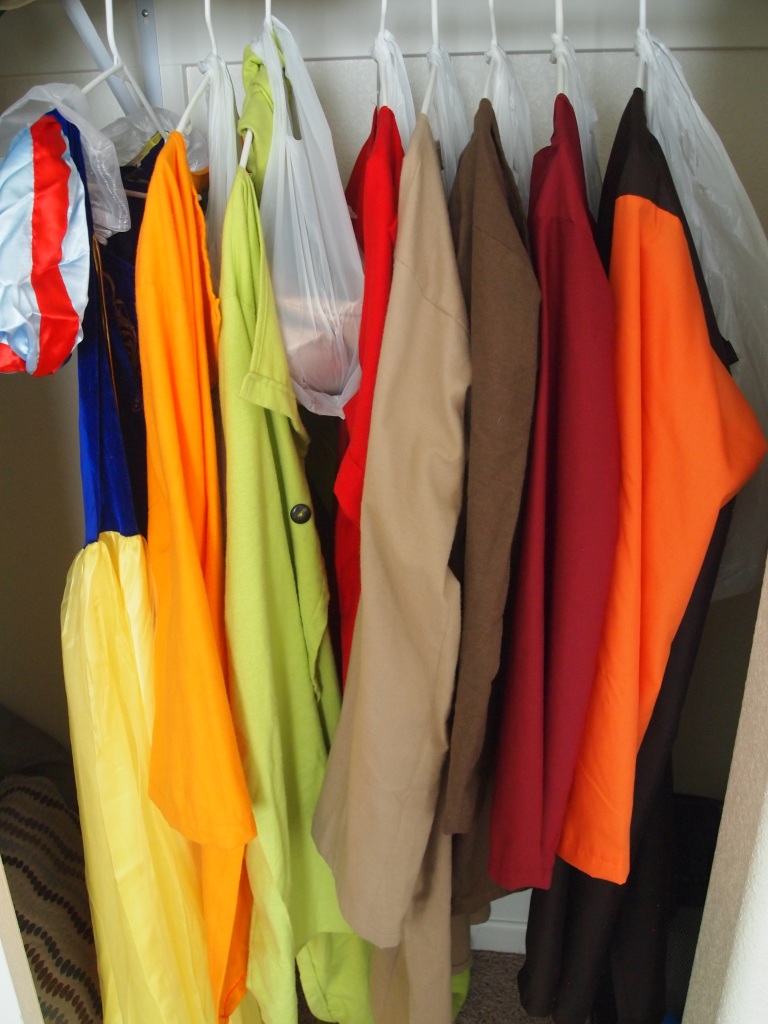
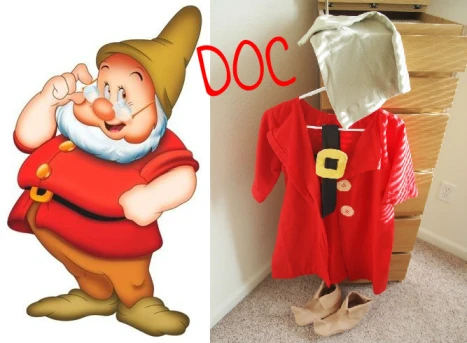
Here are the finished products (and my last post has the whole gang together):


Pingback: Christmas Crafting | FINZO 43P
Pingback: Intention | FINZO 43P
Pingback: Aztec Sweater | FINZO 43P
Pingback: Donation Dog Vest | FINZO 43P
Pingback: Sewing Double: My 1st Monthly Stitch Challenge | FINZO 43P
You are awesome. Thanks for posting this!!
LikeLike
Aww so glad you like it!… I couldn’t find a tutorial out there so I figured I’d contribute one of my own :)
LikeLike
Pingback: Me-Made-May… maybe next year :) | FINZO 43P
Do u sell them pleaae notify me asap 9517323284 thanks
LikeLike
Afraid not… that would be way too much work :)
LikeLike
Pingback: Christmas Crafting 2014 | Life by Ky
Pingback: Bellevue Pattern Testing! | Life by Ky
Pingback: Straight Stitch Designs Bellevue Pattern Testing! | Life by Ky
Thank you for posting, I am using your example of a hat pattern for a 7 dwarfs routine at a recital, Imagine 2015, put on by In Motion Training Center.
I do costumes for individuals and studios. My shirts are going to be wider at the bottom for stuffing on some of them, and their names will be appliqued on the back of the shirt with a bling material :)
Thank you so much for sharing and inspiring!
HotMess Dance Apparel
info@hotmessdanceapparel.com
LikeLiked by 1 person
That’s wonderful! Thanks for sharing! I love that the dwarfs will have bling :)
LikeLike
We finally had our photo session for our annual recital, which will be held on July 18, 2015! I wanted to send you a link to the final product. Our performers did a great job of “getting in character.” I love the wide range of colors for this project. Here are our performers in character: https://www.facebook.com/HotMessDanceApparel/photos/a.162810250535287.38115.162087427274236/488580957958213/?type=1&theater
Unfortunately, I did not get a photo of the costume back where the appliqued names are. However, that can be seen from my fB account.
Thank you for the inspiration!
HotMess Dance Apparel
info@hotmessdanceapparel.com
LikeLike
Those turned out sooo good! I love the colors and the names on the back! Thanks so much for sharing… do you mind if I share your photo on here?
LikeLike
Be my guest! Share away. :)
Thanks,
Lona Smith
HotMess Dance Apparel
Owner & Creative Designer
Serving the Inland Empire in Southern California
LikeLike
Pingback: 2-Year Sewiversary + A Tour of My Sewing Space! | Life by Ky
Just what I was looking for! Thanks so much.
LikeLiked by 1 person
How do you determine the sleeve circumference?
LikeLike
Hi! Sorry, I’m just noticing your comment now :/ Not that you still need an answer a year later, but the circumference was a “make it work” moment… not measured at all. I think I may have used a lab coat as reference for the armscye and went straight out from there. As long as you go a little bigger than you think you’ll need, I don’t think you can go wrong.
LikeLike
Pingback: A Frozen Halloween! | Life by Ky
Did you need to put any elastic around the band of the hats or did they stay on pretty well?
LikeLike
They stayed on pretty well without… as long as your fabric has some stretch, you won’t need the elastic.
LikeLike
Thanks!!
LikeLike
Pingback: A DIY Star Wars Halloween | Life by Ky
Pingback: Tiny Chef Apron Set | The Monthly Stitch