Update (Dec14): Find the printable pattern HERE. Thanks!
Taking inspiration from here, here, and here – I decided to take on the adopt me vest and make my own version for BDAR (as you may know, I used to be a foster mom to some adorable pups… until this one came along and we foster failed) :) So now that I can’t foster anymore (silly rental agreements), I’m trying to find other ways to help out. Hence, my first sewing project with my new sewing machine. Note: I watched my mom sew through my entire childhood, but this is my first unassisted sewing project ever… so if I can do it… you know the saying :) Easy peasy.
Materials Needed:
- Fabric in a few different colors (how much just depends on what size and/or how many you’re going to make)
- Elastic (I used dollar store headbands)
- Printable transfer sheets
- Thread
- Pins
- Scissors
- Tissue paper (or other paper to make the pattern)
- Starch (optional)
- Iron
- Sewing machine
STEP 1: MAKE YOUR PATTERN
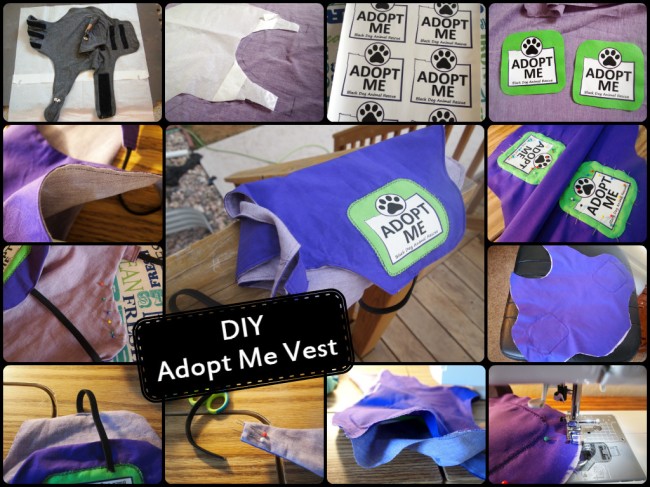
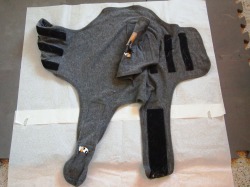
I’m not really one for measuring, so I used my dog’s anxiety shirt as a general guide and traced a pattern. As you can see it’s very approximate and not exactly even – but that’s OK! (If you wanted to make it more even, you could fold the paper and only draw half, then unfold to get a more symmetrical pattern).
STEP 2: CUT YOUR FABRIC
Trace your pattern and cut two pieces of fabric (or as many as you’d like depending on how many vests you are making). At this point, it also helps to iron and starch the fabric to make it a little easier to work with.
STEP 3: MAKE AND ATTACH YOUR LOGO
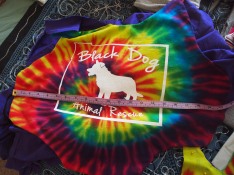
Follow the instructions on your transfer sheets, printing whatever it is you want to put on the vests. Make sure to get the dark material transfer sheets if you are using a colored fabric. You can either transfer them directly onto the pieces you just cut, or transfer them onto another piece of fabric to add a pop of color and sew that piece onto the top vest color.
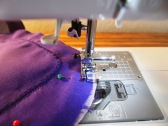
Transfer —> cut –> pin in place–> sew using a wide stitch that covers the edge of the fabric
I tried a few different stitches – ended up liking this one the best:
STEP 4: SEW TOGETHER & ATTACH ELASTIC STRAPS
Right sides together –> pin around all the edges –> sew (about 1/4″ from the edge)
Don’t forget to leave a hole (doesn’t matter where) so that you can flip it inside out –> then flip, pull out all your edges and iron (making sure not to iron over your transfers — that would be bad news)
Now the straps are a little tricky, but not bad… I looked into using buckles or other adjustable straps, but these are much more cost effective and still should stretch to fit a variety of dogs.
For the neck strap, when you are flipping your vest inside out, try to pull the fabric on top where you will connect the straps almost all the way out, but leave the edge in (if that makes any sense… I’m not sure the best way to explain that; see pictures below). You can pin it if the ends are trying to come out but you don’t have to. Then hold the end of the elastic in there and sew a few rows of stitches for reinforcement.
Then for the belly strap, I found it easiest to pull out a few stitches from the inside where you want them to go and then insert/sew from the outside (then do the same with the other side):
If you are worried about your sizing and/or don’t have a pup to try it on as you go, try using these general measurements (I can’t remember where I found them):
X-Small: 13-16 inches. Typical weight: less than 10 lbs
Small: 17 to 25 inches. Typical weight: 11 to 25 lbs
Medium: 26 to 32 inches. Typical weight: 26 to 50 lbs
Large: 33 to 39 inches. Typical weight: 51 to 100 lbs
X-Large: 39 to 47 inches. Typical weight: 101 to 150 lbs
Measure your vest width at the longest part, and then add however many inches of elastic you need to get to the chest measurement you’re looking for:
STEP 5: ADD A FINISHING SEAM
This step is not absolutely necessary, but will definitely make the vest look a little more put-together/finished. Go around the whole thing, about 1/8-1/4″ in from the edge. This also adds a reinforcing stitch for your belly straps and closes up the hole that you left to flip it inside out.
STEP 6: THANK YOUR HELPERS :)
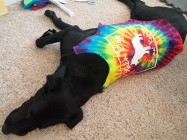
FINISHED PRODUCTS:
See this tutorial for the collar bandanas!
Hopefully these will help get the pups noticed at the adoption drives! And hopefully (maybe) someone will actually find this helpful and make their own! :)
My Cost: (broken down, it’s about $3-6 per vest)
- Dark purple fabric (Hobby Lobby), 2 yards: $6.98
- Green fabric (Hobby Lobby), 2 yards: $9.78
- Bone fabric (Hobby Lobby), 2 yards: $11.18
- Light purple fabric (thrift store sheet): $3.00
- Fabric transfer sheets (Michaels): $9.99 for 5 sheets
- Elastic (black dollar store headbands), 8 per pack: $2.00 for 16
- Purple and green thread (Hobby Lobby): $5.58
- TOTAL: $48.51
- Cost Notes: This made everything above plus I have a lot of materials leftover for future projects; the only thing this doesn’t include is the tie-dye shirt fabric – that came from one XL shirt I stole from my boyfriend. In the future, I would definitely look for a coupon before buying the fabric and/or transfer sheets – craft stores always have coupons! Plus, if I wasn’t looking for a particular color combination, I would try to find more thrift store sheets to use instead of buying the fabric – much more cost effective. But, all-in-all, even paying full price for the fabric is much cheaper than buying vests – looking around, I found they range from ~$12-60. They might not be professionally made, but they are custom and made with love! :)











Pingback: “Adopt Me” Vests: Round Two | FINZO 43P
Pingback: Putting it All Together | FINZO 43P
Pingback: Donation Dog Vest | FINZO 43P
Pingback: Pup Vest Sighting | MakeLifeRx
Pingback: Free PDF Adopt Me Vest Sewing Pattern! +My Favorite Non-Profit Orgs | Life by Ky
HI! I would love to make these for our rescue but the link for the patterns appears to be broken. is there a new one?
michelle
LikeLiked by 1 person
Hmm… try it from here: https://www.dropbox.com/s/tlgbo9tapsju9kq/AdoptMeVest_Pattern.pdf?dl=0 …it’s not a new link but it’s still working from my end. And the instructions: https://www.dropbox.com/s/qdhw7qbmg3wtc2m/AdoptMeVest_Instructions.pdf?dl=0
If it’s still being troublesome, lemme know and I can send it to you directly: https://lifebyky.com/contact/
LikeLike
Pingback: Happy 3-Year Sewiversary! | Life by Ky